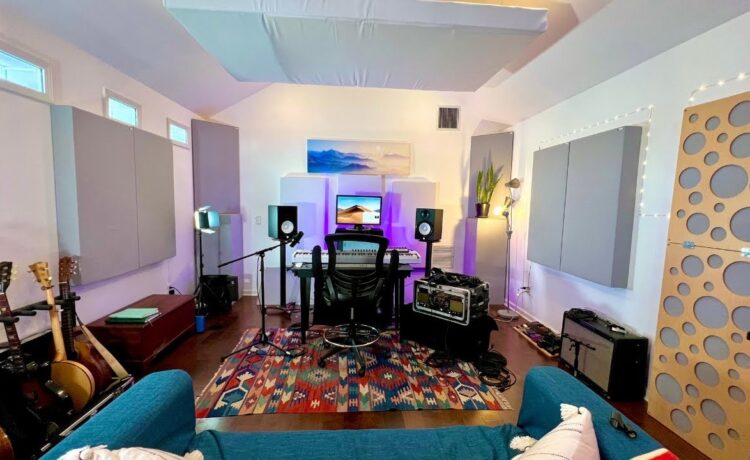
When you’re aiming to create a space that immerses you in crystal-clear sound or fosters an environment where music can be fully appreciated, acoustic panels are your secret weapon. But, installing them can be a bit of an art form.
Here’s a handy guide for homeowners, musicians, and studio owners on how to mount an acoustic panel to achieve the perfect harmony in their spaces.
Understanding Acoustic Panels
Before you start mounting, it’s crucial to know what acoustic panels can do for your space. These sound-absorbing tools are designed to reduce echoes, reverberation, and standing waves in a room. This means clearer audio for home theatres, more defined sound for musicians, and improved acoustics for recording studios and conference rooms.
Pre-Installation Considerations
Making sound decisions before hanging your panels can dramatically affect the performance of your space:
● Room Size and Layout
The size and layout of your room will determine the number and placement of your panels. Larger rooms might need more panels to cover a wider area, while smaller ones could get by with strategic placements.
● Acoustic Panel Materials
The materials used in your panels influence the type of sounds they are best at absorbing. Soft panels can handle mid and high frequencies, while thicker, rigid panels will tackle lower frequencies.
● Desired Sound Improvements
Acoustic improvements vary from reducing echo to accurate sound reproduction. Clearly defining your goals will help you determine the quantity and style of the panels you need.
Strategic Placement Techniques
To maximise the benefits of your panels, think about where to place them within the room:
● First Reflection Points
The first reflection points are critical areas where sound bounces off a surface and reaches your ears slightly after the direct sound. Identify these points and place your panels there to reduce these secondary sounds and improve sound clarity.
● Corners and Edges
Sound gathers and reflects in corners, creating an excessive bass and muddied sound. Target these areas with bass traps, often thicker and denser than regular panels, to balance the sound distribution.
● Ceiling and Wall Mounting Considerations
Depending on your space, you might need to mount panels on the ceiling, wall, or both. Make sure the mounting location is secure and is the appropriate distance from the wall for peak performance.
Mounting Methods and Tools
Proper mounting secures the panels in place and guarantees they’ll last. Here are some methods and tools to consider:
● Direct Mounting
This involves fixing the panels directly onto the wall. It’s a permanent solution but offers the most secure attachment.
● Using Stands or Frames
Stands and frames offer a more flexible solution, allowing you to move the panels to find the best position. They could be a better option for temporary installations or spaces that need reconfiguration.
● Temporary vs. Permanent Installations
Decide if your panel placement will be permanent or temporary. Temporary fixes, such as adhesive strips, can be changed or repositioned, while screws or nails offer a stable, long-term hold.
Avoiding Common Installation Mistakes
To enjoy the full benefits of your acoustic panels, steer clear of these blunders:
● Overcrowding or Underutilisation
Balance is key. Overloading your room with too many panels can “over-deaden” the sound, while too few may not make a noticeable difference.
● Ignoring Panel Orientation
For maximum sound absorption, the right panel orientation is crucial. Panels are most effective when installed perpendicular to the wall to trap sound in the panel’s material.
● Lack of Testing for Optimal Placement
While there are general guidelines for panel placement, every room is unique. Use acoustic measurement tools to find the best spot for each panel and adjust as needed.
● Acoustic Measurement and Adjustment
After installing your acoustic panels, conducting acoustic measurements can provide insights into the effectiveness of your placement strategy. Tools like sound level meters and room analysis software can help you identify any areas where sound may not be optimally absorbed.
Based on these findings, adjustments can be made to panel positions, ensuring that your space achieves the desired acoustic properties. This iterative process of measuring and adjusting is crucial for fine-tuning your environment’s sound quality.
Conclusion
Acoustic panels offer a practical and effective solution for improving sound quality in any space. By understanding the basics of panel placement, materials, and mounting techniques, you can create an environment that optimises sound production and enjoyment. Remember to consider your goals, room size, and layout, and use proper tools and methods to ensure a successful installation. Happy listening!


